Adding Images
Adding ImagesTo add an image to your page you should select the image icon in the WYSIWYG editor.
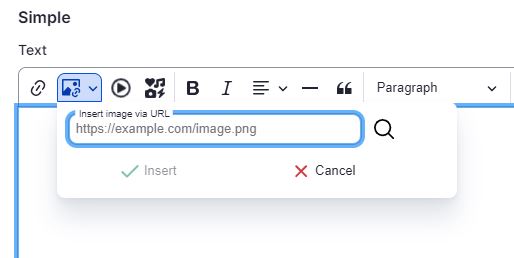
From there you will see the below Pop-up box to select your image. Select File Browser (magnifying glass icon) to search for, or upload your image to the site.
To upload a file, in the File Browser dialog box that opens, click on the Upload icon on the top menu, then the Add File button, and choose a file to upload from your computer. After uploading a file, click Select on the top menu to add the file to the page.
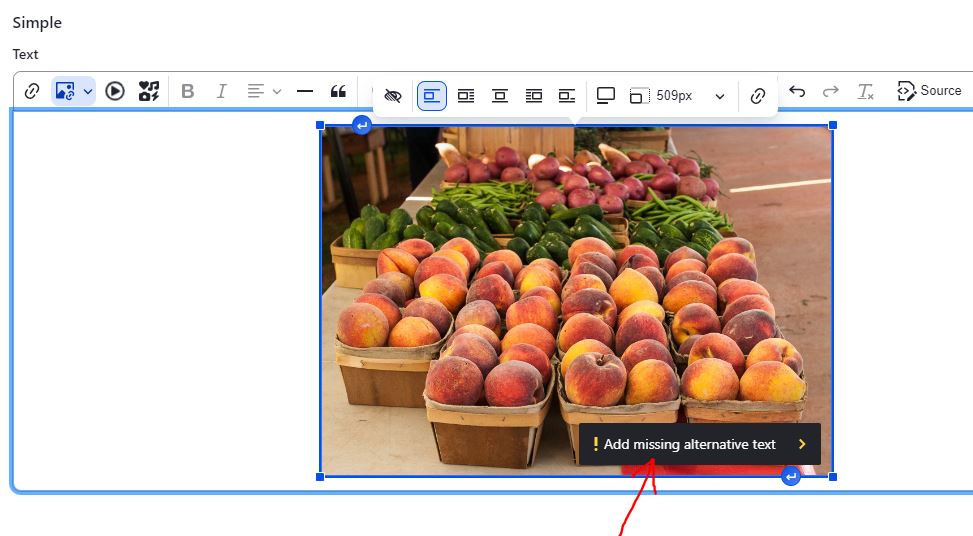
To remain ADA compliant, remember to fill out the Alternative Text box with a simple image description. Click on the Missing alternative text link as shown in the screenshot below, add the alternative text, and click the Insert link to add the text.
In the Insert Image pop-up box, you can select how to align the image on the page. The site will automatically align any text based on how you align the image.
You can also choose to add a caption to the image.
The image can also be resized by selecting one of the image corners and resizing the image size on the screen, or by choosing the original image size to restore the image size in the Resize image drop-down in the image menu.
The image can have a link added by selecting the Link Image icon (the last icon on the image menu screenshot below), adding a link URL, and selecting the save link.

To access the image properties after you've added your image to the site you can click the image.
After making the image changes Save the page.