Check In and Check Out Documents
Check In and Check Out DocumentsContent Sections
SharePoint is meant for collaboration and working together, but there are situations that warrant the ability to lock down a document for editing temporarily. In order to do this, you can use the Check out feature.
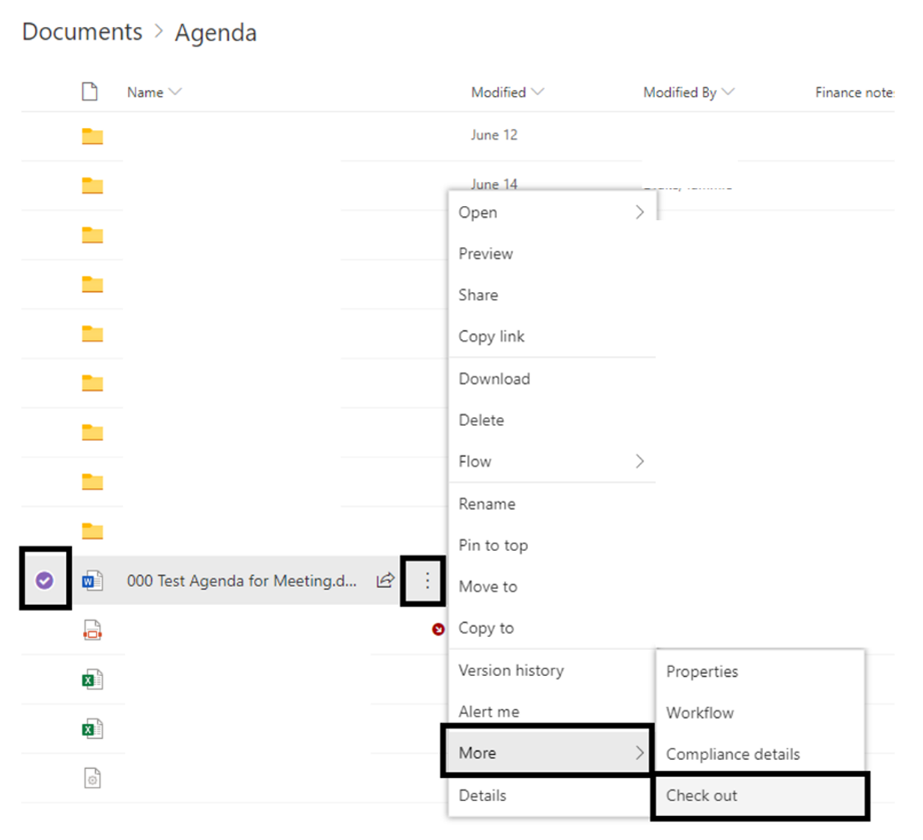
To check out a document:
- Navigate to the document you wish to lock for editing/check out and select it by checking the checkbox next to the document.
- Using the ellipses menu or the top ribbon menu, select Check Out. This will check out the document to you and lock it for editing by other users. Documents that are checked out will be notated by a red diagonal down arrow as seen in the screenshot below. Checked out documents can be checked in by an administrator if the need arises such as the user being out of office or no longer with the organization.
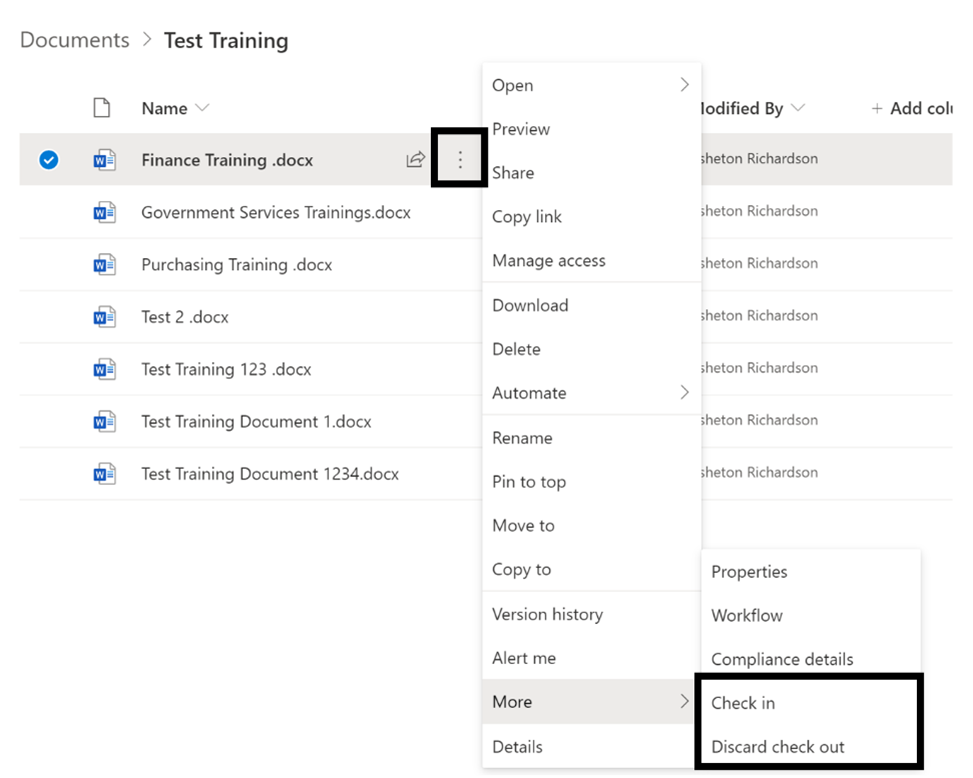
- When you are ready to check the document back in, follow the same steps and select Check In. During check in you can choose to discard your check out which will remove your changes and recent the document, or you can check it back in with your changes for others to access and edit as needed. Upon check in, you can submit a comment that summarizes your changes which will show in version history moving forward.